背景和需求
我在写博客或者周报的时候,一般会这样管理我的分支:
- 1). 创建带日期的分支,比如
blog/2024-01-28, weekly/2024-01-28。 - 2). 然后在这个分支上写好博客或者周报。
- 3). 创建 PR,合并到 main 分支。
- 4). 合并到 main 分支后,会触发 CD 自动部署。
步骤 3) 很容易忘记,所以我想通过 GitHub Actions 来自动化这个过程。
方案
创建一个 Github Actions 的 Workflow,每天定时检查分支名,
发现有当天的日期的分支 weekly/xxxx-xx-xx 的时候,自动创建 PR 并合并到 main 分支。
实现
准备工作
- 在 Github 中创建一个 Personal Access Token (PAT),用于创建和合并 PR。(BTW,到期时间最大只能设置 2 年)
1.1. 设置
PAT的仓库权限:Repository access→Only select repositories→ 选择你的仓库。 1.2. 设置PAT的仓库访问权限:Permissions→Repository permissions。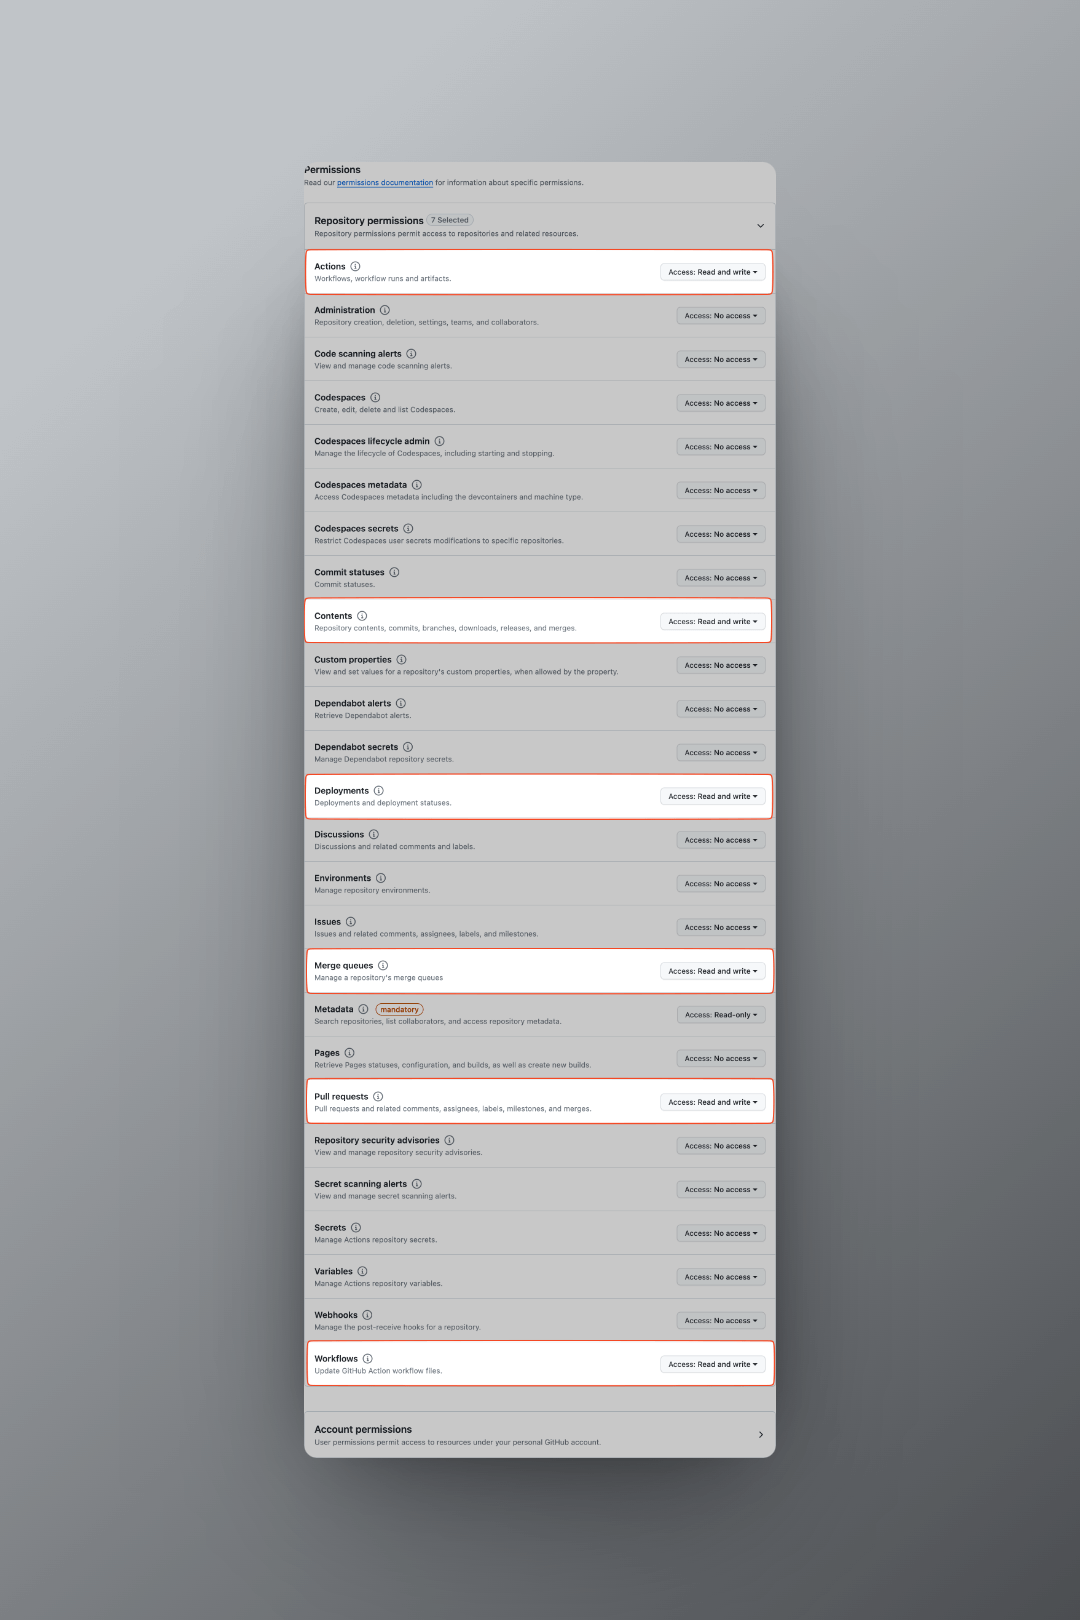
- 在仓库中创建一个 secret,用于存放 Personal Access Token。
创建 Workflow
在仓库中创建 .github/workflows/merge-pr.yml 文件,内容如下:
name: Merge Weekly Posts Branches
on:
  schedule:
    - cron: "00 00 * * *"
  workflow_dispatch:

jobs:
  merge_weekly_branch:
    runs-on: ubuntu-latest

    steps:
      - name: Checkout repository
        uses: actions/checkout@v4

      - name: Set up Git
        run: |
          git config --global user.email "[email protected]"
          git config --global user.name "GitHub Actions"

      - name: Create and merge PR
        env:
          GITHUB_TOKEN: ${{ secrets.GH_TOKEN }} # Personal Access Token
        run: |
          # Get the current date in the format 'YYYY-MM-DD'
          current_date=$(date +%Y-%m-%d)

          # Construct the branch name
          branch_name="weekly/${current_date}"
          # Fetch the branch to ensure it exists locally
          git fetch origin ${branch_name}

          # Check if the branch exists
          if [[ -n "$(git ls-remote origin $branch_name)" ]]; then
            git checkout ${branch_name}
            # Create a pull request using GitHub CLI
            gh pr create --base main --head $branch_name --title "weekly post PR" --body "This is a PR for weekly post changes."

            # Wait for a few seconds to allow GitHub to process the PR creation
            sleep 15
            # Merge the pull request using GitHub CLI
            gh pr merge --squash
          else
            echo "Weekly branch '${branch_name}' does not exist."
          fi
 图 2
图 2